Monday, June 24, 2019

1880 Whitbread Porter 1.1


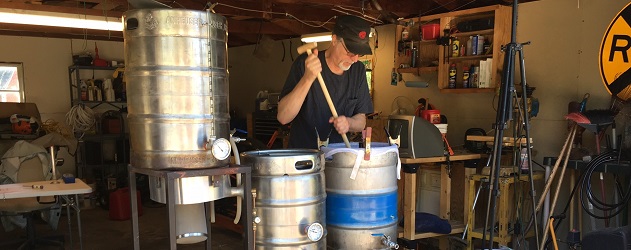
This aim of this brew session was to get the previous 1880 Whitbread Porter, which I really liked the first time around, to have just a bit more malt backbone. So a few changes were made to achieve that goal. I added some Roasted Barley. I mashed a few degrees higher than before which should give more body to the beer. And I used a different yeast which is supposed to give a marmalade character found in many English pub ales.

One other change to the making of the beer itself was that I used a different yeast starter making technique called the Shaken Not Stirred method which I wrote about in the last post. Oh, and I also made a tweak in how I heated my strike water.

The recipe is very similar to the previous version:
However looking at it now I wonder why I increased the black malt from 12 oz to 1 lb? And if that was a mistake should the roasted barley also have been 12 oz? The yeast I used was Imperial Pub A09 and I mashed at 154 F. 

I can see right now that I am going to have start taking more detailed notes and paying better attention to details.

Thursday, June 20, 2019

Shaken, Not Stirred


Tomorrow is brew day. Version 1.1 of the 1880 Whitbread Porter. Normally I would like to have had my yeast starter started two days before brew day but I had read about a technique called Shaken, Not Stirred for making yeast starters and decided to give it a try.

My normal starter routine is to calculate how much cell growth I need for a given beer's OG and then make a starter of the recommended size. Full disclosure... I don't make the calculations, I use the starter tool in Beersmith 3. The SNS method however says forget cell count and concentrate on pitching healthy cells that are ready to go to war. Those being the words of the man who pioneered this method.

That person is Mark Van Ditta, AKA yeastwhisperer, AKA S. Cerevisiae on the American HomeBrewers Association forum. Mark's research has shown him that pitching a smaller amount of robust yeast who are, again as he puts it, ready to go to war is much more advantageous than pitching a large amount of tired yeast cells that are more inclined to take a nap than storm the beaches.

A link to Marks in depth explanation follows but here is my synopsis and the steps I took just this afternoon.

The idea is to prepare a starter as usual. The size of the vessel you use must be four times the volume of the starter medium. Here is where SNS takes a left turn; instead of using a stir plate you shake the the starter medium for a minute or two to fill the vessel with as much foam as possible hence the name. Also, instead of a couple of days sitting on the stir plate you will pitch the yeast at high krausen, usually within 12 to 18 hours.

After shaking for 1 minute
My Steps: 
1.   Gather all the equipment needed
- 1 Gallon jug with cap. The cap is necessary during the shaking
- A little more than a quart of water (enough extra to account for boil off)
- 3 to 4 ounces of DME
- Funnel
- Scissors
- Airlock
- Yeast
- Sanitizer

2.   Prepare and boil starter wort for 15 minutes; chill when compete
3.   While chilling; wash and sanitize jug, funnel, and other equipment
3.   When starter medium has chilled transfer it to the cleaned and sanitized vessel
4.   Cap jug and shake for at least one minute. 
5.   Let starter medium rest in the capped vessel for 15 minutes
6.   Sanitize scissors and yeast package, open package and pitch into starter vessel
7.   Pitch starter medium into fermenter at high krausen.

For the last word on the Shaken, Not Stirred method read what Mark wrote back in 2015.

Don't miss my brew day update coming soon.
Monday, June 17, 2019

Brewery Graphics

I've been working on some graphics for my brewery. The first brew system I owned that earned a name was the "Front Porch Brewery". So named because I always set it up on the front porch. It was all gravity fed so using the front steps was a natural fit and worked very well. With my new electric brew system however I thought something a bit more grand was needed. Certainly something better than the "Garage Brewery".  Backing out of the driveway one morning it occurred to me, "you know, Gabel Road is not a bad looking little lane". And so the Gabel Road Brewery was born.


Next up I designed a basic shield beer label. It's been sitting on my computer for months now and with a pretty good first version of the 1880 Whitbread Porter on tap I sat down today to mock up a label for it. Any resemblance to another Porter label is purely coincidental. Nothing very fancy about it, I just played around with various fonts until I found one close to the look I was after and flooded the background with a brown gradient.


Still in the fermenter but soon to be transferred to keg is my Dirty Bastard clone. Using my blank label template I chose a new font for the name. My photo editing software does not have a tartan pattern. So I made one.

I started with a green gradient background and rotated it 45 degrees then chose to "repeat" it a dozen or more times. I used the flood tool to fill the background of my template. Next I duplicated that background and mirrored it. I reduced the density of that mirrored image by 50% to get a tartan-like checkerboard but it was still all green. So I flooded the white lines with a rusty red color and added some blur effect to soften the edges and bingo! An acceptable tartan background.


Next up I plan to keg the Filthy Bastard within the next day or so and I will be brewing version 1.1 of the 1880 Whitbread Porter. I was going to leave that one alone since it turned out so well but I have decided to make a few tweaks after all. A blog update and Youtube video is forthcoming to reveal those changes.

Saturday, June 8, 2019

Founders Dirty Bastard Clone

Brew Day! 6.7.19


One of my 2019 goals is to develop a clone of one of my favorite beers, Dirty Bastard from Founders in Grand Rapids, Michigan.

I began with two trains of thought. One was to start with a standard Scotch Ale of similar properties to Dirty Bastard. Then to tweak and modify that recipe until I reached an acceptable approximation.

The second was to find an existing clone recipe as my starting point. That is the path I chose. Hopefully someone else has already done the experimentation saving me time and money.

I had hoped to find one or two... maybe three different recipes so I could compare what was common to them all and maybe weed out the unnecessary ingredients. Homebrewers have a habit of using every type of specialty grain they see on the shelf... or leftovers they have on hand and want to get rid of. 

Brew day was not without its issues. Once again I missed my mash temperature by nearly 9 degrees. One of three things is happening... maybe a combination of all of them. I either do not have my equipment profile correctly constructed in Beersmith. The temperature probes on my kettles are not calibrated properly giving me false readings. Or the system is losing  more heat than I am used to between the transfer of water between the hot liquor tank and the mash tun.


Another issue is the gravity readings. I was getting varied readings from my refractometer ranging from exactly what I expected to very, very low. I chose to record the ones that I expected. Upon taking the OG just before pitching yeast however I was getting consistently low readings. Making me doubt everything else during the brew session. Nothing sucks more than not being sure you hit your targets.

The recipe: Some changes were noted during brew day... The East Kent Goldings were labeled as 6% alpha acids and the Perle 7.6%. Instead of a single package of Wyeast 1728 I used two packs in a 2.25 liter starter made the day before. Note: the measured gravity and alcohol content were not recorded. Those below are just what Beersmith thinks they are going to be.


I shot video on brew day but as I write this it is still uploading. You can watch it here with other brew day videos.

Saturday, June 1, 2019

1880 Whitbread Porter Tasting

A serious sinus infection delayed the kegging of this beer for two weeks! Meaning it was in the primary fermenter for 4 weeks. For new homebrewers who may think this is terrible believe me, it is not.

You may have read books or blog posts in the past saying that after fermentation is complete you must get your beer off the yeast cake or you risk off flavors and/or ruining your beer! Friends and other homebrewers may have told something similar. The thing about brewing is that we are learning all the time and some of  what we learn today contradicts what we thought was true not that very long ago.

The trouble here is that the printed word lasts a long time. Couple that with the viral nature of the internet and you have two forces at work to revive outdated information. The third leg in this axis of ignorance is that we as human beings find it very hard to let go of long held beliefs. Even when those beliefs are proven wrong.

I kegged this beer  six days ago from this writing. It probably could use another day or three but I couldn't wait. The first pour happened just a moment ago and I am sipping a beautiful and silky smooth porter at this very moment.


First of all, I set my CO2 regulator to 9 PSI and my keezer is at 40 F which should give me 2.2 volumes of CO2 in my beer. A bit on the high side for an English Porter but within limits. The initial impression of the beer is, yes, it could do with three or so days more on the gas before drinking. The carbonation is low and the head is thin and does not last long. This will improve.

Next is the color. A rich, dark chocolate hue that is everything a porter should be. The nose is very pleasant with the aroma of roasted coffee and chocolate. Upon tasting I get more of that roasty, coffee, chocolate character with a hint of dark fruit... plumb or raisin.

The final gravity came in lower than predicted and that is noticeable. Not in the extra alcohol but in the lack of extra sweetness. While the beer does have a sweet aspect it is in no way too sweet. The same can be said of the hops. The hint of hop bitterness is there but not up front. Both malt and hops have found their perfect Goldilocks zone.

This beer is silky smooth going down. The first thing I want before even finishing this pint is to have another. But I will hold off knowing that this beer will get even better given a little bit of time.

Time. Four weeks of time spent on the yeast cake in the primary fermenter. Something that would have been unthinkable when I started brewing 20 years ago. Then again, back then I would have beer expected to transfer this to a secondary fermenter to "clean up" before bottling or kegging and we all know that's a load of bollocks these days don't we.